
Changing Tray Paper Settings on the Control Panel
Changing the paper size
The available paper type varies depending on the paper tray, so the displayed screen is different.
Tap [Paper] on the home screen.
Tap the tray to change paper settings.

In [Paper Size], specify the size of the loaded paper.
Setting [Auto Detect] to ON automatically detects the size of the loaded paper.
Tapping [Custom Size] allows you to directly enter and specify the length and width of paper.
If you select the paper size category from the drop-down list, the system jumps to the selected category.
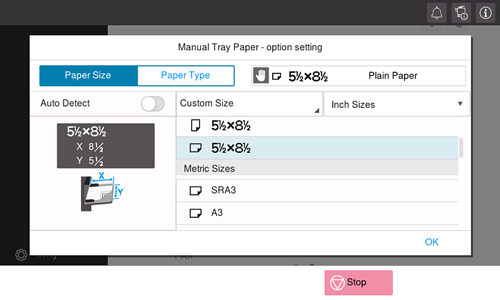
Tap [OK].
Changing the paper type
The available paper type varies depending on the paper tray, so the displayed screen is different.
Tap [Paper] on the home screen.
Tap the tray to change paper settings.
In [Paper Type], specify the type of the loaded paper.
For label sheet, select [Thick 1+].
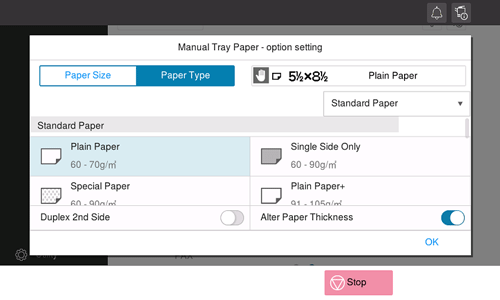
Tap [OK].

When you are using plain paper of 15-15/16 lb to 18-5/8 lb (60 g/m2 to 70 g/m2), select [Plain Paper] and [Thickness]. The paper tray for which [Thickness] is set to ON is placed to a low priority level among the paper trays in which plain paper is loaded. However, if [Thickness] is set to ON in all paper trays, the appropriate paper tray is selected based on the priority sequence specified in [Auto Tray Selection Settings] (Here).
Specifying the custom size
When loading custom-sized paper, directly enter the length and width of paper.
Custom-size paper can be loaded in Tray 1, Tray 2, or Bypass Tray.
Tap [Paper] on the home screen.
Tap the tray to change paper settings.
In [Paper Size], tap [Custom Size].
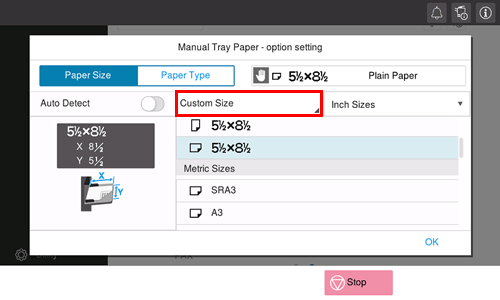
Specify the length and width of the paper.
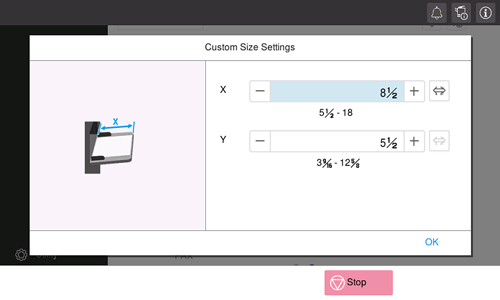
Tap [OK].