
Adding Text or an Image to the Original
- Adding a watermark (Watermark)
- Registering/editing a watermark
- Composing an overlay image (Overlay)
- Creating an overlay image in the computer
- Creating an overlay image in a shared folder
- Adding the print date/time or page number (Date/Time/Page Number)
- Adding information to the header/footer (Header/Footer)
Adding a watermark ([Watermark])
Text such as "NO REPRODUCTION" and "INTERNAL USE" are printed on the center of all pages in a tint color.
By printing a watermark, you can specify the handling policy of copied documents.

In the [Stamp/Composition] tab, select the [Watermark] check box. In addition, select the watermark you want to print.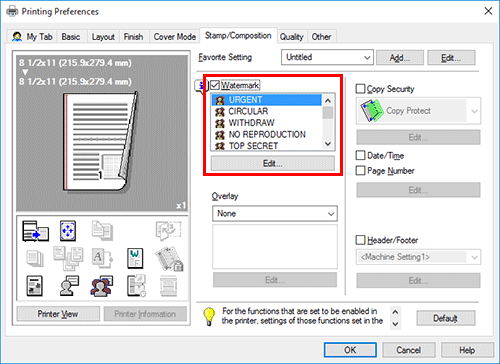

[Watermark] is available only when the printer driver for Windows is used.
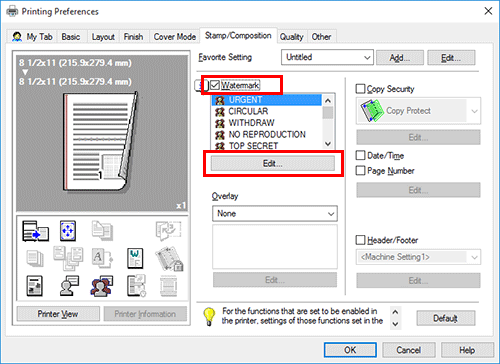
Registering/editing a watermark
This machine has several factory-set watermarks. However, you can register new watermarks or edit existing watermarks as necessary.
In the [Stamp/Composition] tab, select the [Watermark] check box, and click [Edit...].
Click [Add] and register the watermark data.
To edit a registered watermark, select the watermark from the [Current Watermark] list, and edit the data.
To delete a registered watermark, select the watermark from the [Current Watermark] list, and click [Delete].

Setting
Description
[Watermark Name]
Enter the name to be displayed in the watermark list (using up to 30 characters).
[Watermark Text]
Enter the text to be displayed as a watermark (using up to 30 characters).
[Up]/[Down]
Clicking these buttons changes the order of items in the list. You can move frequently used watermarks to upper positions.
[Position]
Specify the print position for the watermark.
[X]/[Y]: Adjust the horizontal and vertical positions of the watermark. The values change as you move the slide bar.
[Center]: Click this button to reset the watermark position to the center.
[Angle]: Adjust the angle of the watermark.
[Font Name]
Select the font for the watermark.
[Size]
Specify the font size for the watermark.
[Style]
Select the font style for the watermark.
[Frame]
Select the frame for the watermark.
[Text Color]
Select the color of the watermark.
[Transparent]
Select this check box to print the watermark in a translucent tone.
When this check box is cleared, the printed watermark obscures the background.
[1st Page Only]
Select this check box to print the watermark only on the first page of the original.
[Repeat]
Select this check box to repeatedly print the watermark on each page.
[Sharing]
Select this check box to share the watermark with other users.
Click [OK].
Composing an overlay image ([Overlay])
An overlay image registered in the computer or this machine is recalled and printed on the original as a composite image.

In [Overlay] in the [Stamp/Composition] tab, select [Print Host Image] or [Print Device Image] (PCL only), and then from the list, select the overlay image to be printed on the original as a composite image.
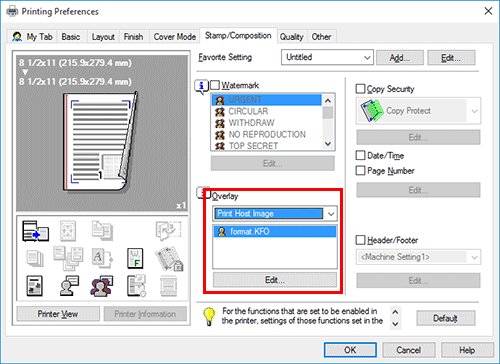
As necessary, click [Edit...] to add or delete overlay images. Alternatively, change the method of composing an overlay image.
When you have selected [Print Host Image]:
Setting | Description | |
|---|---|---|
[Select Overlay File] | Add or delete overlay images. | |
[Browse Files...] | Add an overlay image to the list. | |
[Delete] | The selected overlay images are deleted from the list. | |
[Change 2nd Page and Later] | Select this check box to change the overlay image to be printed on the second and subsequent pages of the original. In addition, from the list, select the overlay image you want to use. | |
[File Information] | Information on the selected overlay image is displayed. | |
[Overlay Print Setting] | If necessary, change the method of composing an overlay image. | |
[Pages] | Select the range of pages on which an overlay image is composed. | |
[Overwrite] | Select whether to compose the overlay image by overwriting the image on the front side of the original, or to composite it on the back side of the original. | |
When you have selected [Print Device Image]:
Setting | Description | |
|---|---|---|
[Obtain Device Information] | If your computer can communicate with this machine, your computer obtains and displays the latest information on the overlay images registered in this machine. | |
[Overlay Info] | Information on the overlay image selected from the list is displayed. | |
[Print on Front Side]/[Print on Back Side] | Select this check box to compose an overlay image on the front and back sides. In addition, specify how to compose an overlay image. | |
[Overlay Name] | Select the overlay image to be composed. Click [Browse...] to confirm the detailed overlay information. | |
[Select Color] | Select the color of the overlay image to be composed. | |
[Density] | Specify the density of the overlay image to be composed. | |
[Overwrite] | Select whether to compose the overlay image by overwriting the image on the front side of the original, or to compose it on the back side of the original by watermarking the image. | |
[Same as Front Side] | Select this check box to apply the settings for the front side to the back side. | |
[Pages] | Select the range of pages on which an overlay image is composed. | |
[Overlay] is only available when the printer driver for Windows is used.
Creating an overlay image in the computer
In your computer, you can create an image that is composed on the original from [Overlay] in the [Stamp/Composition] tab. For example, you can register a corporate letterhead or other forms for use as a composite image on the original.
In application software, create an original to be registered in an overlay image.
In [Overlay] in the [Stamp/Composition] tab, select [Create Host Image].
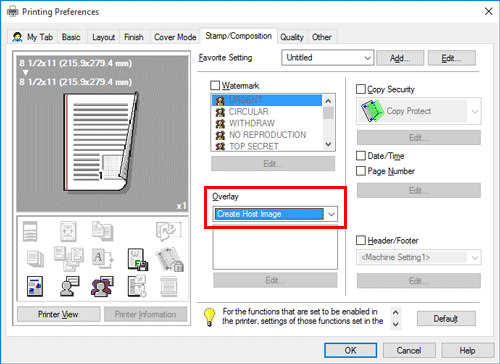
In the application software, execute printing.
The [Create Overlay File] window appears.
Enter the file name and save the file.
The overlay image is saved on your computer. From then on, when you select [Print Host Image] in [Overlay] in the [Stamp/Composition] tab, the saved overlay image is displayed in the list and is also available.
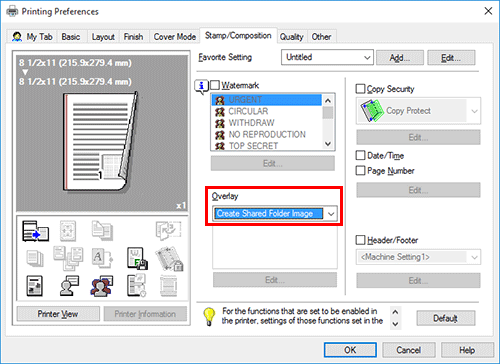
Creating an overlay image in a shared folder
In a shared folder, you can create an image that is composed on the original from [Overlay] in the [Stamp/Composition] tab. The created overlay image can be shared by other users.
First, in the [Settings] tab, register a shared folder for storing the overlay image.
Display the [Properties] window of the printer driver.
For information on how to display the [Properties] window, refer to Here.
In the [Settings] tab, select the [Share Overlay File(s)] check box.

The [Shared Folder Settings] window appears.
Specify the shared folder for storing the overlay image, and click [OK].
This completes the registration process of a shared folder. Then, create an overlay image.
In application software, create an original to be registered in an overlay image.
In [Overlay] in the [Stamp/Composition] tab, select [Create Shared Folder Image].
In the application software, execute printing.
The [Create Overlay File] window appears.
Enter the file name and save the file.
The overlay image is saved in the shared folder. From then on, when you select [Print Host Image] in [Overlay] in the [Stamp/Composition] tab, the saved overlay image is displayed in the list and is also available.
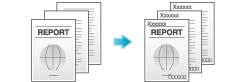
Adding the print date/time or page number ([Date/Time]/[Page Number])
You can add the print date/time or page number to your printouts. If necessary, you can select the print position and format of the text.
Date/Time

Page Number

In the [Stamp/Composition] tab, select the [Date/Time] or [Page Number] check box.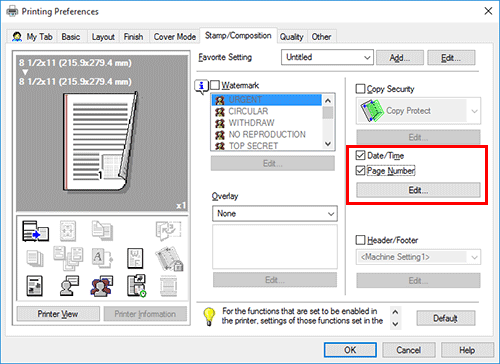
As necessary, click [Edit...] to change the print position and format of the text.
Setting | Description | |
|---|---|---|
[Date/Time] | Change the print position or format of the date/time. | |
[Format] | As necessary, click [Edit...] to specify the date/time format or whether to print the time. | |
[Pages] | Specify the range of pages on which the date/time is printed. | |
[Text Color] | Select the print color for the date/time. | |
[Print Position] | Specify the print position for the date/time. | |
[Page Number] | Change the print position of page numbers and the page from which the page number printing starts. | |
[Starting Page] | Specify the page from which the page number printing starts. | |
[Starting Page Number] | Specify the page number to be printed on the page specified in [Starting Page]. | |
[Cover Mode] | Select this check box to print page numbers on the front and back covers when they are inserted. In addition, select the format. | |
[Text Color] | Select the print color for the page numbers. | |
[Print Position] | Specify the print position for the page numbers. | |
Adding information to the header/footer ([Header/Footer])
You can add and print the date and time and arbitrary text in the top or bottom margin (header/footer) of the original. You must register the information to be added for the header and footer in advance on this machine. For details on the registration procedure, refer to Here.
In the [Stamp/Composition] tab, select the [Header/Footer] check box. In addition, select the information you want to add to the header/footer.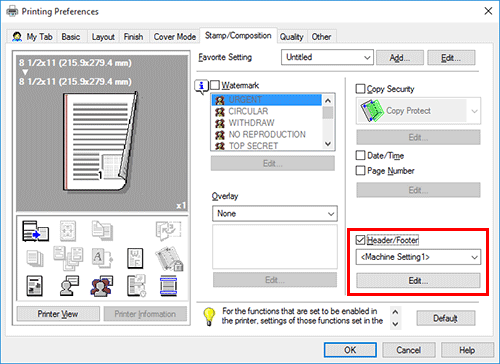
As necessary, click [Edit...] to change the range of pages on which the header/footer is printed and other settings.

Setting | Description |
|---|---|
[Recall Header/Footer] | Select the header/footer to be recalled. If your computer can communicate with this machine, clicking [Obtain Device Information] obtains and displays the latest header/footer information registered in this machine. |
[Distribution Control Number] | Select whether to print copy numbers when printing multiple sets of copies.
As necessary, click [Edit...] to specify the copy number format and the page from which the copy number printing starts. |
[Pages] | Select the range of pages on which the text is printed in the header/footer. |
[Text Color] | Select the color of the text to be added to the header/footer. |