
Saving the Number of Copy Sheets
To copy on both sides of paper ([Duplex])
To display:
- [Classic Style]
- [Copy]
- [Duplex/Combine]
- [Original > Output]
- [Duplex/Combine]
- [Copy]
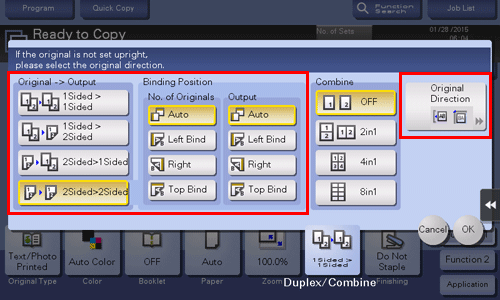
Copies an original onto both sides of paper.
Setting | Description | |
|---|---|---|
[Original > Output] | Select a combination of the original to be loaded (1-sided original or 2-sided original) and the copy method (1-sided copy or 2-sided copy). If you have selected other than [1Sided > 1Sided], also specify [Binding Position] and [Original Direction]. | |
[Binding Position] | Select the binding positions of the original and copy. | |
[No. of Originals] | Select the original binding position when loading a 2-sided original.
| |
[Output] | Select the binding position when printing on both sides of paper.
| |
[Original Direction] | Specify the orientation of the loaded original. | |
To copy multiple pages on the same side of a single sheet ([Combine])
To display:
- [Classic Style]
- [Copy]
- [Duplex/Combine]
- [Combine]
- [Duplex/Combine]
- [Copy]
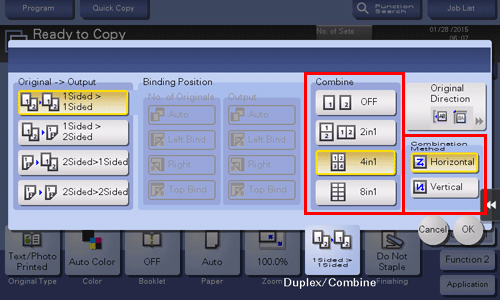
Select the number of original pages to be copied on a single page.
If [4in1] or [8in1] is selected, you can select the combined page layout from [Horizontal] or [Vertical].
To copy an original image repeatedly on the same side of a single sheet ([Image Repeat])
To display:
- [Classic Style]
- [Copy]
- [Application]
- [Layout]
- [Image Repeat]
- [Layout]
- [Application]
- [Copy]
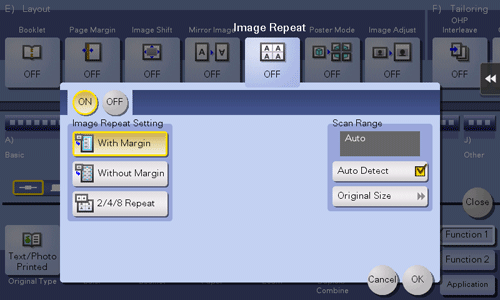
Copies an original page repeatedly onto the same side of a single sheet.
Setting | Description |
|---|---|
[ON]/[OFF] | Select [ON] to specify Image Repeat. |
[Image Repeat Setting] | Select the copy method on the paper.
|
[Scan Range] | You can either to set the machine to automatically detect the scan range (original size), or specify the scan range manually. If the original is of a standard size, selecting [Auto Detect] causes the machine to automatically detect the size. If the machine cannot detect the size of irregular sized originals or photos, manually specify the size. |
To skip blank pages ([Blank Page Removal])
To display:
- [Classic Style]
- [Copy]
- [Application]
- [No. of Originals]
- [Original Settings]
- [Blank Page Removal]
- [Original Settings]
- [No. of Originals]
- [Application]
- [Copy]
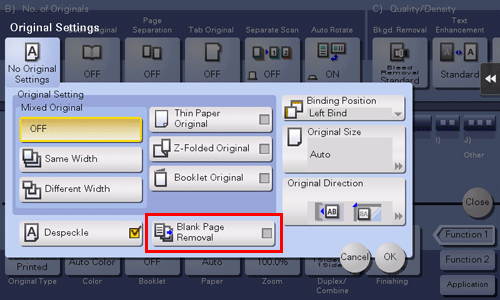
When [Blank Page Removal] is specified to scan an original including blank pages using the ADF, blank pages are excluded from scan targets. Blank pages detected are not counted as original pages.

To copy the front and back sides of a card on the same side of a single sheet ([Card Shot])
To display:
- [Classic Style]
- [Copy]
- [Application]
- [Other]
- [Card Shot]
- [Other]
- [Application]
- [Copy]
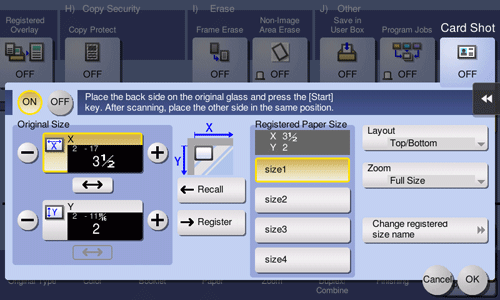
Arranges the front and back sides of the card on the same side of a single page to make copies when you want to copy cards.
Setting | Description |
|---|---|
[ON]/[OFF] | Select [ON] to specify Card Shot. |
[Original Size] | Specify the size of a card to be copied. From the [Registered Paper Size], you can recall a size previously stored and specify the size. After you have entered the size, select a key in [Registered Paper Size], and tap [Register]. Then the size you have entered is registered in the memory. You can recall the registered size at a later date. |
[Registered Paper Size] | Displays the sizes registered in memory. When you call a registered size from the memory, tap the key of the desired registration name, then tap [Recall]. |
[Layout] | Select the layout for arranging the front side and back side of the card on the paper from [Top/Bottom], [Left/Right (Top Half)], and [Left/Right]. |
[Zoom] | Select a zoom ratio for copying.
|
[Change registered size name] | Change the name of the key you selected in [Registered Paper Size]. |