
Sending PC-FAX
To perform PC-FAX Send
- Transmission Flow
- The FAX Transmission Popup Screen
- Call the Frequently Used Settings
- Managing the Recipient Information by the Computer (Using the Phone Book)
To send a fax with a cover sheet
Send a Fax with a Cover Sheet
When you open the [FAX Transmission Popup] screen and select the [FAX Cover Sheet] check box, you can add a cover sheet to the fax when sending.

You can edit the cover sheet data in the [FAX Cover Sheet Settings] screen, which is opened when you click [Settings...]. Also, you can set it in the [FAX] tab of the fax driver.
Open the [FAX Transmission Popup] screen, and select the [FAX Cover Sheet] check box.
Click [Settings...].
The [FAX Cover Sheet Settings] screen opens.
Select a size of cover sheet from the [Cover Size].
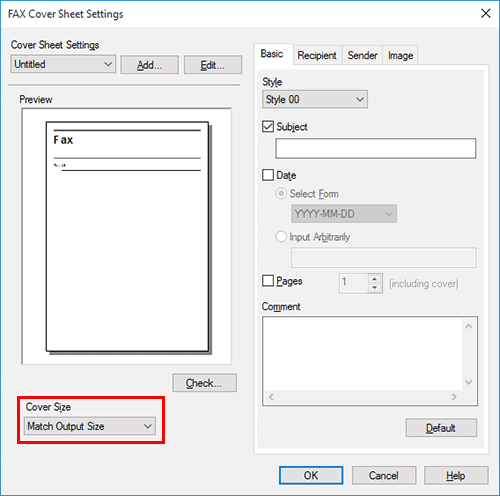
Set a style and subject of the cover sheet in the [Basic] tab.
Setting
Description
[Style]
Select a style of cover sheet.
[Subject]
When you write a subject on the cover sheet, select this check box and enter the subject (using up to 64 characters).
[Date]
When you write the date on the cover sheet, select this check box and specify the date format.
[Select Form]: Select a format of date.
[Input Arbitrarily]: Enter a format of date (using up to 20 characters).
[Pages]
When you write the total number of fax pages on the cover sheet, select this check box and select a number of fax pages including the cover sheet.
[Comment]
When you send a comment to the destination, enter it using up to 640 characters. (New Line code is considered to be two characters long.)
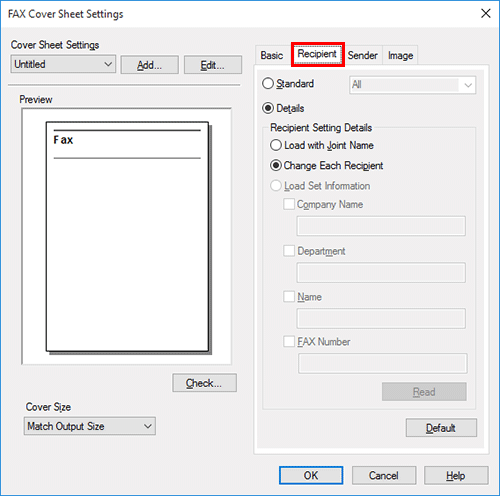
Open the [Recipient] tab, and select the [Standard] or [Details] format of destination.
Setting
Description
[Standard]
Use the standard characters to write the standard character string, which does not specify the recipient, on the cover sheet.
[Details]
When you write the recipient information on the cover sheet, set a style.
To add a title to the recipient, add it when you set the recipient name in the [FAX Transmission Popup] screen.
[Load with Joint Name]
Enter the joint name of recipients which has been added to the [Recipient List] of [FAX Transmission Popup] screen.
[Change Each Recipient]
This option changes the information written on the cover sheet for each recipient. Enter the contents of [Recipient List] displayed in the [FAX Transmission Popup] screen.
You can create different cover sheets for up to 100 recipients.
[Load Set Information]
Enter the information you have set in the [Company Name], [Department], [Name], and [FAX Number] fields (using up to 80 characters for each entry).
You can select this option if a recipient has been added to the [Recipient List] of [FAX Transmission Popup] screen.
When you click [Read], information of the first line of [Recipient List] of the [FAX Transmission Popup] screen is reflected.
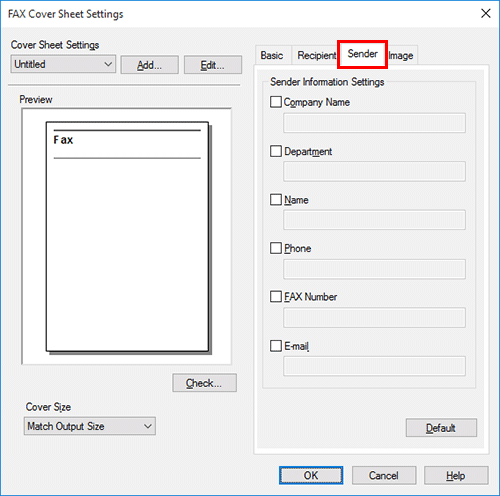
Enter the sender information in the [Sender] tab (using up to 80 characters for each entry).
To add an image, specify an image file in the [Image] tab.
You can place images such as company's logo and map on the cover sheet. BMP format can be specified.
Select the [Zoom] check box to zoom an image.
Set a position to add an image, using [X:] and [Y:] options.

Check the layout image of cover sheet.
Click [Check...] to enlarge and check the layout image.
When you click [Add...], the cover sheet image is saved and you can recall it later by selecting [Cover Sheet Settings].
Click [OK].
To send a fax at the preset time (Timer TX)
Sending a Fax at Preset Time (Timer TX)
About timer transmission
The Timer TX function can send a fax at the preset time if you have set a time in advance.
If you use the timer transmission during telephone rate discount time in early morning or late at night, you can cut the communication cost. You can send up to 20 faxes by timer transmission.
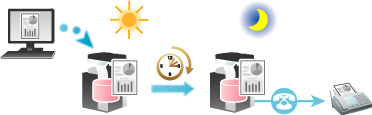
When you use the timer transmission, check that the clock time of the PC matches the clock time of this machine. If the clock time of this machine has already passed the specified send time, the fax is sent the next day.
How to send
From the [FAX Transmission Popup] screen, select [Fax Mode Setting Details...].
The [Fax Mode Details] screen opens.
Select the [Timer Send] check box, and set the [Send Time].
When you click [Reflect Current Time], the current clock time of the PC is reflected on the [Send Time].
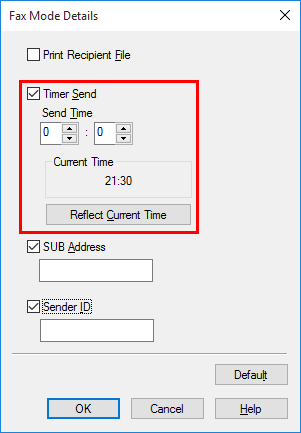
Click [OK].
To send a confidential fax (Confidential Communication)
Sending a Confidential Fax (Confidential Communication)
About confidential communication
The confidential communication function is designed for communications with specific people using a Confidential User Box that requires a registered number and a password.
This ensures fax communications are sent with enhanced security.
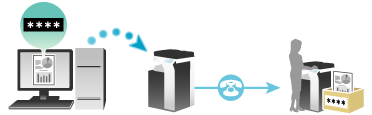
The destination fax needs to have the F-code function.
When sending a confidential fax, you need to check the recipient's Confidential User Box number and the password for confidential fax reception.
How to send
From the [FAX Transmission Popup] screen, select [Fax Mode Setting Details...].
The [Fax Mode Details] screen opens.
Specify the recipient's Confidential User Box.
[SUB Address]: Enter the Confidential User Box number of the recipient.
[Sender ID]: Enter the password for the recipient's Confidential User Box.
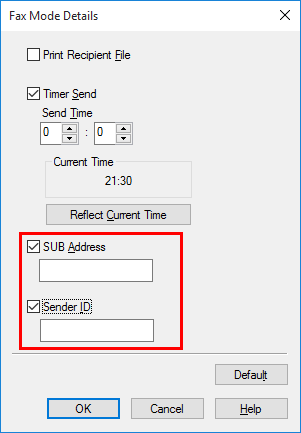
Click [OK].
To broadcast via a relay station such as a branch office (Relay Distribution)
Sending a Fax via Relay Station (Relay Distribution)
About relay distribution
The Relay Distribution function distributes a fax to the preset recipients using relay stations.
Overall communication costs can be reduced by grouping relay stations and destinations by area, compared to the case in which faxes are broadcast to all destinations. This function is useful when broadcasting faxes to distant locations.
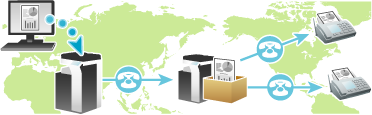
The destination machine (the relay machine) needs to have the F-code function.
When using the relay distribution, you need to check both the number of the Relay User Box defined for the relay station and the password.
How to send
From the [FAX Transmission Popup] screen, select [Fax Mode Setting Details...].
The [Fax Mode Details] screen opens.
Specify the recipient's Relay User Box.
[SUB Address]: Enter the Relay User Box number of the recipient.
[Sender ID]: Enter the password for the recipient's Relay User Box.
Click [OK].
To send a fax with authentication information while user authentication is enabled
Send a Fax with Authentication Information
About fax transmission for authentication setup
If user authentication and account track have already been employed, each user needs to send his/her authentication information (the user name and password) to this machine when sending PC-Fax. This limits the users who can send PC-Fax via the machine and prevents unauthorized use by third parties.
When this machine receives a send job from a user who is not authorized to use this machine, or when this machine receives a send job that does not have any authentication information, this machine discards these jobs automatically.

A send job that does not have any authentication information refers to a job whose user authentication or account track has not been set correctly in the [Configure] tab in the [Properties] screen of the fax driver.
Enabling user authentication or account track on the fax driver
Open the [Configure] tab of the fax driver, and ensure that the user authentication or account track has been set correctly.
Open the [Properties] screen of the fax driver.
For information on how to display the [Properties] window, refer to Here.
In [Device Option] in the [Configure] tab, check that the User Authentication/Account Track setting is correctly configured for your operating environment.
If it is not configured correctly, select [User Authentication] or [Account Track] from the list, then change the relevant setting in [Setting].
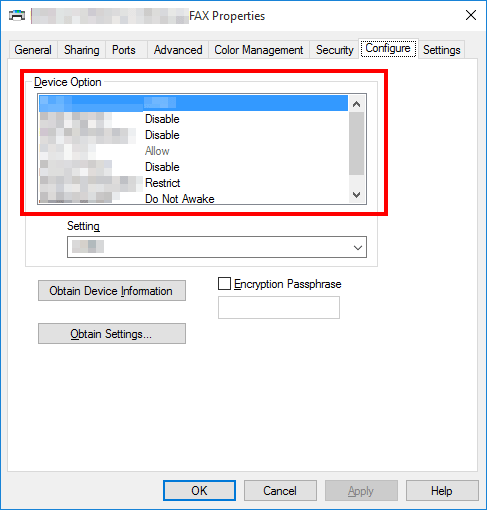
Click [OK].
How to send
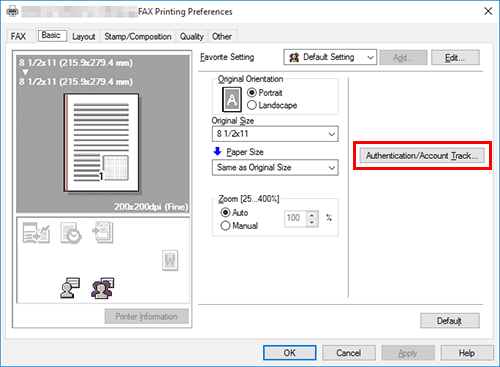
In the [Basic] tab, click [Authentication/Account Track...].
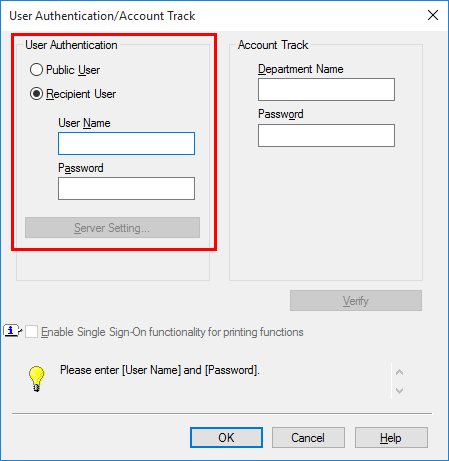
When user authentication is enabled, select [Recipient User], then enter the user name and password.
If access to this machine by public users (unregistered users) is allowed, you can select [Public User] and send a fax without entering the user name and password.
When using an external authentication server, click [Server Setting...] and select the authentication server.
If you always use the same user name and password, registering them in advance eliminates the need for entering them each time. For details, refer to Here.
If account track is enabled, enter the account name and password.
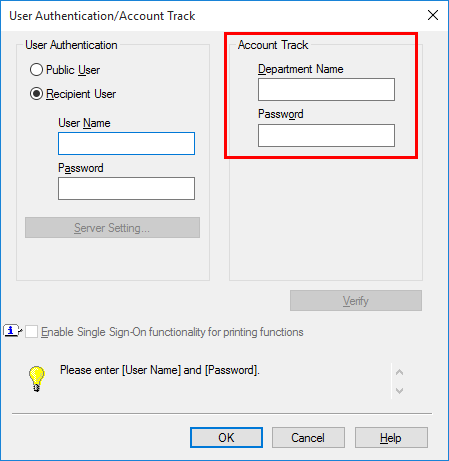
If you always use the same account name and password, registering them in advance eliminates the need to enter them each time. For details, refer to Here.
Click [OK].
If your computer can communicate with this machine, clicking [Verify] executes authentication based on the authentication information that has been input. You can check the authentication information for errors before starting printing.
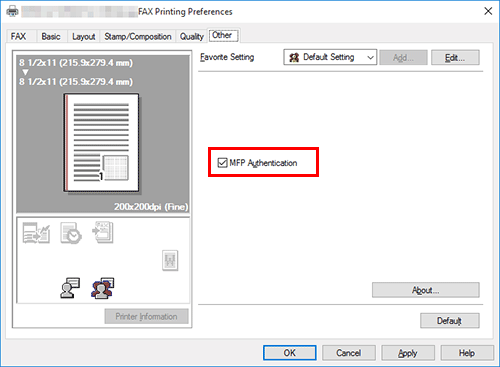
To perform MFP authentication when external server authentication is used together, select the [MFP Authentication] check box in the [Other] tab.
Send a fax.
If the authentication information is correct, the fax is sent.