
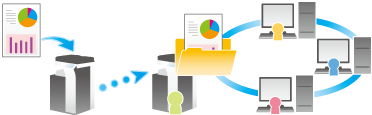
Saving a File to a User Box on this Machine to Share it in the Office ([Public], [Personal], [Group])
To register a User Box to be Shared in the Office
Create User Box
Up to 1000 User Boxes can be registered.
Select [Utility] - [Utility] - [Box] - [User Box List].
In [New Registration], configure the following settings.
Setting
Description
[User Box Number]
Registration number of the User Box. Select [Use opening number] to automatically assign the smallest available number. When specifying a number, select [Input directly], and enter a value between 1 and 999999999.
[User Box Name]
Enter the User Box name (using up to 20 characters).
[Assign User Box Password]
To restrict usage of the User Box with the password, set this setting on.
[User Box Password]: Enter the User Box password (using up to 64 characters, excluding double quotation marks ").
[Index]
Select an index using the registered name.
[Type]
When user authentication or account track is enabled, select the User Box type. If [Personal] is selected, specify the owner user. If [Group] is selected, specify the owner account.
[Auto Delete Document]
Specify the period from the date/time when a file was saved in a User Box; the date/time when a file was last printed; or the date/time when a file was sent from a User Box, to the date/time when a file is to be deleted automatically.
[Do Not Delete]: Keeps the file in the User Box.
[Specify days]: Select the number of days until the file is automatically deleted.
[Specify Time]: Enter the time period before the file is automatically deleted.
[User Box Expansion Function]
Configure the User Box expansion function as needed.
[Confidential RX]
Set to ON when adding the confidential RX function to the User Box (default: OFF).
[Communication Password]: Enter the password for confidential RX (using up to eight characters). The password entered here is required to send a fax to this machine using Confidential TX. Inform the sender of the password you entered here.
[Auto Save Document to MFP Shared Folder]
Set to ON when using the Auto Save Document to MFP Shared Folder function (default: OFF).
In [SMB Communication Encryption], select whether to encrypt SMB communications with a client device. To use the encryption function, the password must be specified for the User Box. Enabling the encryption function permits only accesses from client devices of SMB 3.0 or later.
This setting is available when the following conditions are satisfied.
[Type] is set to [Public].
[Confidential RX] is set to OFF.
[SMB Server Settings] and [Share SMB File Setting] are set to ON in [SMB Server Settings] (Here).
[Web Connection Download Settings]
Select whether to download a file in a User Box at high speed (default: [Normal Download]).
The following types of documents are not targeted for this setting.
Document stored in a User Box by the print function of the computer
Document stored from USB memory to User Box
Document stored in a User Box using the F code function
Tap [OK].


To save a shared file to a User Box
Save File in a User Box
Saving (Basic operation flow)
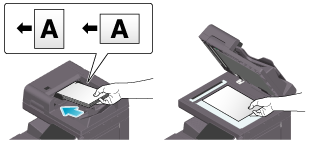
Load the original.
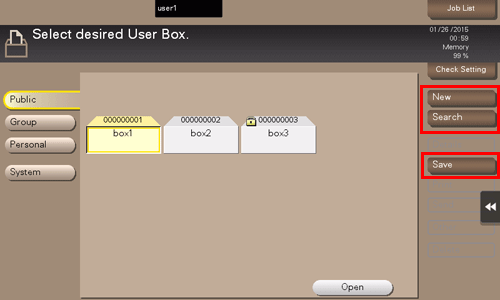
Display the User Box screen.
For details on how to display the screen, refer to Here.
Select a User Box to save a file in, and tap [Save].
This example uses the Public User Box for explanatory purposes. To use a Personal User Box or a Group User Box, tap [Personal] or [Group], and select the desired User Box.
You can tap [New] to create a new User Box. For details, refer to Here.
To search for a User Box to save a file in, tap [Search]. For details, refer to Here.
Specify options to save a file as needed.
For details on option settings, refer to Here.

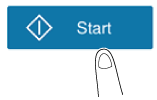
Use the Start key to start saving.

If the specified period lapses while files saved in a User Box remain unused, they are deleted automatically when the [Auto Delete Document] has passed (default: [1 day]).
Saving files in copy mode
You can save original data scanned in copy mode of classic style to a User Box.
For details, refer to Here.
Saving in scan mode
You can save original data scanned in scan mode to a User Box.
For details, refer to Here.
Save files from a PC
When specifying to print using the printer driver, you can specify a User Box number and store the print data in the box.
For details, refer to Here.
Save file from a USB memory
You can save a file stored on a USB memory in a User Box.
For details, refer to Here.
Changing the default save settings
You can change the default option settings when saving the original data scanned on this machine to a User Box or USB flash drive.
The default option settings are common in both the case in which a document is saved in a User Box, and the case in which it is saved on a USB flash drive.
Display the User Box screen.
For details on how to display the screen, refer to Here.
Select a User Box to save a file in, and tap [Save].
Specify the function of which you want to change the default.
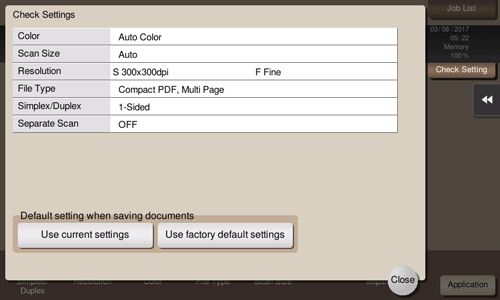
Tap [Check Setting].
In [Default setting when saving documents], tap [Use current settings].
To return to the factory default settings, select [Use factory default settings].
Tap [Yes].
To print a file saved in a User Box
Print File in a User Box
Printing (Basic operation flow)
Display the User Box screen.
For details on how to display the screen, refer to Here.
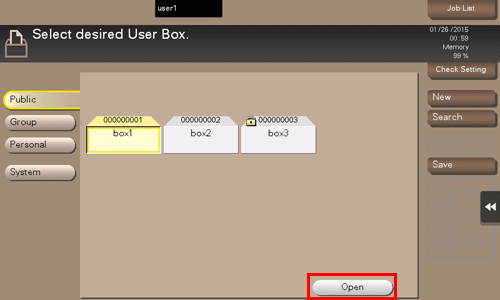
Select the desired User Box, and tap [Open].
This example uses the Public User Box for explanatory purposes. To use a Personal User Box or a Group User Box, tap [Personal] or [Group], and select the desired User Box.
If the target User Box is protected using the password, tap [Open], and enter the password.
You can also open the desired User Box by tapping it twice.
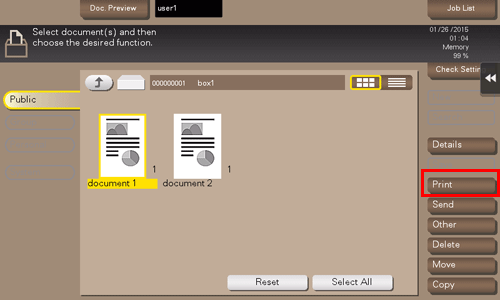
Select a file to print, and also tap [Print].
You can also long-tap the target file to display the menu icon, then drag and drop it to
 to get the same result.
Specify print options as needed.
If an output image cannot be displayed, [Preview on Screen] is displayed. To check an output image, tap [Preview on Screen], and confirm the target output image on the preview screen.
For details on option settings, refer to Here.

If necessary, specify the number of copies using the keypad.
Tapping [No. of Sets] displays the keypad.
To change the number of copies, tap [C] (Clear).
Use the Start key to start printing.
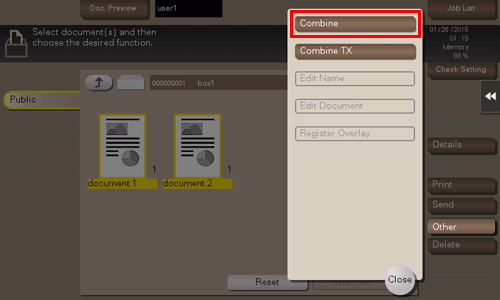
Collectively printing multiple files (Combine)
When printing multiple files at the same time, you can combine those files and handle them as a single job. This is called the Combine printing.
Using this function, you can reduce the print time and improve the efficiency as you can skip to repeat printing files one by one. You can collectively print up to 10 files.
Display the User Box screen.
For details on how to display the screen, refer to Here.
Select the desired User Box, and tap [Open].
This example uses the Public User Box for explanatory purposes. To use a Personal User Box or a Group User Box, tap [Personal] or [Group], and select the desired User Box.
If the target User Box is protected using the password, tap [Open], and enter the password.
You can also open the desired User Box by tapping it twice.
Select files you want to print collectively, and tap [Other] - [Combine].
Change the printing order (Combine sequence) as needed, and tap [OK].
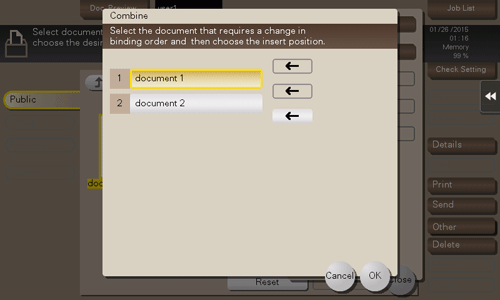
If you print a file containing a watermark first, the watermark will also be printed on the second and subsequent files.
Specify print options as needed.
If an output image cannot be displayed, [Preview on Screen] is displayed. To check an output image, tap [Preview on Screen], and confirm the target output image on the preview screen.
For details on option settings, refer to Here.
If necessary, specify the number of copies using the keypad.
Tapping [No. of Sets] displays the keypad.
To change the number of copies, tap [C] (Clear).
Use the Start key to start printing.
To send a file saved in a User Box to an E-mail address or computer on the network
To operate a User Box on this machine through a computer
Operate a User Box via Web Connection
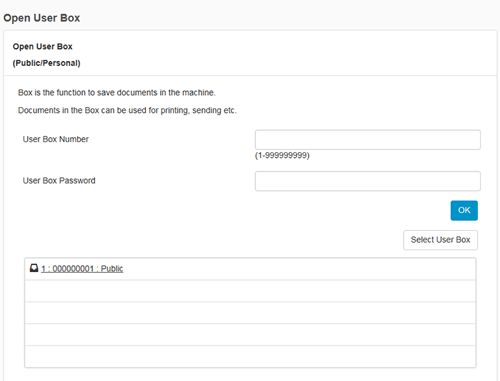
Open User Box
Log in to the Web Connection user mode, and open a User Box.
Access to the Web Connection, using the Web browser.
For details on how to access Web Connection, refer to Here.
Log in to the user mode.
For details on how to login to the user mode, refer to Here.
Click [Box] - [Open User Box].
Click and select a User Box to open from the list.
If the User Box list does not include the desired User Box, first click [Select User Box], select the check box for the User Box to be displayed in the list, then click [OK] in advance.
You can also open a desired User Box by entering its number directly in the [User Box Number] column.
If the User Box is password-protected, you need to enter the password.
Printing a file in a User Box
Access to Web Connection using the Web browser.
Log in to the user mode.
Click [Box] - [Open User Box].
Click the desired User Box from the User Box list.
Click a file to print, and also select [Print].
Change the print settings as necessary.
Setting
Description
[Combine]
This option is displayed when multiple files are selected.
You can combine multiple files into a single file and print them at the same time. If you select multiple files and set [OFF], you cannot use the [Basic Setting] and [Application Setting] options.
[Basic Setting]
You can set a number of copies, 2-sided Print, and Finishing if necessary.
[Application Setting]
Configure more detailed setting such as Page Margin or Stamp.
[Save Print Settings]
Specify to save the current print settings or not.
This option is not displayed when multiple files are selected.
[Change order]
This option is displayed when multiple files are selected.
You can change the print sequence if necessary. Select files, and change their print sequence by clicking [Top], [Up], [Down], [Bottom], or [Undo].
To display files as thumbnails, click [Thumbnail View].
Click [OK].
Printing starts.
Click [OK].
The file list screen appears again.
Sending files in a User Box
Access to Web Connection using the Web browser.
Log in to the user mode.
Click [Box] - [Open User Box].
Click the desired User Box from the User Box list.
Click a file to send, and select [TX].
Specify the destination. If necessary, change the send settings.
Setting
Description
[Specify destination]
Click [Search from List], and select the destination from the Address Book. When checking the destination list, click [Check Destination].
[Bind TX]
This option is displayed when multiple files are selected.
You can combine multiple files into a single file and send them at the same time. If you select multiple files and set [OFF], you cannot use the [File Type] and [Application Setting] options.
[File Type]
Specify the file type and encryption contents for a file to be sent.
[Communication Setting]
Configure E-mail settings or specify the URL notification destination.
[Application Setting]
Configure more detailed setting such as Stamp or Send & Print.
[Change order]
This option is displayed when multiple files are selected.
You can change the file transfer sequence if necessary. Select files, and change their print sequence by clicking [Top], [Up], [Down], [Bottom], or [Undo].
To display files as thumbnails, click [Thumbnail View].
Click [OK].
Transmission begins.
Click [OK].
The file list screen appears again.
Download files in a User Box to the PC
The file size of up to 400 MB can be downloaded at one time. If the file size exceeds 400 MB, specify the page range setting before downloading to limit the file size to download at one time to less than 400 MB.
Access to Web Connection using the Web browser.
Log in to the user mode.
Click [Box] - [Open User Box].
Click the desired User Box from the User Box list.
Select the check box of the file you want to download, and click [Download].
Set the download options.
When a file is selected:
Setting
Description
[Change the settings.]
This option is displayed when downloading files from a Public User Box that has the Share SMB File function specified.
If the Share SMB File function is enabled and a general format file exists in an SMB sharing folder, clear the [Change the settings.] check box. You will then be able to directly download files from the SMB sharing folder. This allows higher speed downloading.
If no general format file exists in an SMB sharing folder, select the [Change the settings.] check box. You will then be able to download files by converting them into a general format.
[File Format]
Select a type of the file to save.
[Outline PDF]
Select whether to use Outline PDF when [Compact PDF] is selected in [File Format].
[Page Range]
You can download all pages of file or the specified range of pages to the PC.
[Page Separation]
This option is displayed when a file containing multiple pages is selected. Select whether to separate a file every the specified number of pages.
When multiple files are selected:
Setting
Description
[Download format]
Select whether to compress multiple files in zip format or combine multiple files as a single file.
[File Format]
Select a type of the file to save. To set each file to the same file type as when they are saved in a User Box, select [Same as Scan or Same as "During Scan"].
[Outline PDF]
Select whether to use Outline PDF when [Compact PDF] is selected in [File Format].
[Page Separation]
This option is displayed when a file containing multiple pages is selected. Select whether to separate a file every the specified number of pages.
When [Combine two or more documents into one file and download.] is selected in [Download format], the file cannot be separated on a page basis.
[Change order]
This option is displayed when multiple files are selected.
You can change the file storage sequence if necessary. Select files, and change their print sequence by clicking [Top], [Up], [Down], [Bottom], or [Undo].
To display files as thumbnails, click [Thumbnail View].
When [Download multiple documents into a Zip format.] is selected in [Download format], the sequence cannot be changed.
Click [OK].
When [Preparation for download has been completed.] is displayed, click [Download].
The File Download page appears.
Click [Save].
Specify the storage location and file name, and click [Save].
Click [Back].
The file list screen appears again.
Move or copy files in a User Box to another User Box
Access to Web Connection using the Web browser.
Log in to the user mode.
Click [Box] - [Open User Box].
Click the desired User Box from the User Box list.
Select the check box of the file you want to move or copy, and click [Move/Copy].
You cannot select multiple files.
Set the move or copy options.
Setting
Description
[User Box Number]
Select the destination User Box from the User Box list.
[Copy]
Select this check box to copy a file to the selected User Box.
Click [OK].
The file is moved or copied to the destination User Box.
Click [OK].
The file list screen appears again.
Delete files from a User Box
Access to Web Connection using the Web browser.
Log in to the user mode.
Click [Box] - [Open User Box].
Click the desired User Box from the User Box list.
Select the file you want to Delete, and click [Delete].
Check the name of the file to delete, and click [OK].
When you select multiple files and display them as thumbnails, click [Thumbnail View].
Click [OK].
The file is deleted, and the file list screen appears again.
To share files in the Public User Box on the network using the Share SMB File function
Sharing Files in the User Box on the Network (Share SMB File)
About Share SMB File
Share SMB File is a function that shares files in the Public User Box of the machine on the network using the machine as an SMB server.
When [Auto Save Document to MFP Shared Folder] is enabled for Public User Box, the SMB folder corresponding to the Public User Box is created in the storage of this machine. If files are saved in the Public User Box, they are also saved in the corresponding SMB folder automatically. The files saved in the SMB folder via the Public User Box can be extracted easily by accessing the SMB folder on the network from a computer.
Only the following files saved in the Public User Box can be shared on the network.
Files saved to the Public User Box in User Box mode
Files saved to the Public User Box in scan mode
Files saved to the Public User Box from the copy mode, printer driver, or USB flash drive cannot be shared on the network.
Preparation required to use this function (for the administrator)
Enable the Share SMB File function, and also enable the Auto document registration to MFP Shared Folder function for the Public User Box.
For details on the setting procedure, refer to Here.
Accessing the SMB folder from computer
Access the SMB folder of the Public User Box in the same way as when accessing the SMB folder on the network from a computer.
The SMB folder of the Public User Box is named "9-digit User Box number_User Box name".
If the Public User Box is protected using the password, the following ID and password are required for authentication to access files in the SMB folder.
ID: User Box number
Password: Password specified for the Public User Box
If a User Box administrator is specified, the SMB folder can be accessed by performing authentication using the ID and password of the User Box administrator even if the password is set to the Public User Box.
If the total file size in the SMB folder exceeds 90% of the available capacity in the storage of this machine, it is notified to the E-mail address of the User Box administrator. If the User Box administrator's E-mail address is not set, the notification is sent to the E-mail address of the machine administrator.
Re-registering a file in a User Box to the SMB folder (Here)